Terms of service
Article 1 Introduction
1. These Terms of Use apply to the provision of kimono rental and incidental services (hereinafter referred to as the "Service") provided by Kawaii Osaka KIMONO RENTAL & SALE (hereinafter referred to as the "Company") at each of our stores (hereinafter referred to as the "Service"). This sets out the terms of use.
2. Persons who use this service (hereinafter referred to as "Users") must abide by all of these Terms and Conditions as well as all information on our website (hereinafter collectively referred to as "These Terms, etc."). You agree to the following.
3. If a problem arises with this service, we will discuss it based on these Terms, etc., and matters not stipulated in these Terms, etc. will depend on the information provided at the place where this service is provided, laws and regulations, or general customs.
4. This service is a service that is intended to be enjoyed as a personal hobby, and you may not use the kimono provided by our company at salons or specific gatherings, or use the kimono provided by our company for commercial purposes without prior permission from our company. Not available. If the user wishes to use the service in this way, they must contact us at least two weeks in advance from the reservation date, and we will discuss the usage fee etc. individually depending on the usage. .
5.This service is intended for those who can choose their own kimono and obi. Therefore, if your guardian chooses the kimono or obi instead of you, or if you are accompanied by a guardian, you may be refused entry.
6.We do not allow accompanying persons (friends, photographers, etc.) who do not rent a kimono to enter the store.
7. This service cannot be used by pregnant women. In the unlikely event that you do not notify us in advance that you are pregnant, and any troubles occur, our store will not be held responsible in any way.
Article 2 Reservation registration procedure
1. When using this service, users shall, in principle, enter the necessary information on our website and apply for use of this service.
2. After receiving the application mentioned in the preceding paragraph, the Company will accept the application by displaying the reservation confirmation on the Company's website and will send a reservation confirmation email to the user. This contract comes into effect when we send you a reservation confirmation email.
3. If the Company applies for the use of this service by telephone, email, or by visiting the store, instructions on how to apply will be provided separately on the Company's website, and the user shall follow the instructions.
Article 3 Reception and provision hours of this service
1.The service hours are as stated on each store's website.
2.This service cannot be provided to anyone outside of the reserved time. Customers outside of the reserved time will not be allowed to enter the store, nor will they be allowed to wait inside or in front of the store. If your reservation is divided into two or more groups, please be sure to arrive at your respective reservation times.
3. This service cannot be provided or baggage storage or collection can be carried out outside of the service hours. However, the baggage of those using the next day return service will be held until the time the kimono is returned.
4. In order to ensure the safety of users, this service is provided only if heavy rain (landslides, flooding), floods, storms, blizzards, or heavy snow warnings are issued within the municipality of the store two hours before the start of business. If this happens, we will close the store and not provide this service. In this case, even if any disadvantage arises to the user, the Company will not be held responsible at all as it is due to force majeure.
Article 4 Contents and usage fees of this service
1.The contents of this service, usage fees, and payment methods are as stated on our website.
2.The Company may revise the content of this service, usage fees, and payment methods without prior notice, and campaigns may differ depending on affiliated stores and branches, so users should check the latest version of the Company's website. You will apply for this service based on the above.
Article 5 Late fees for this service
1. If you do not return to the store on time, a late fee of 3,000 yen per person will be charged.
2. If the user fails to return by the time without contacting the store in advance and obtaining the consent of the employee, the store will be closed at the end of the service. Returns will be made the next day, and a late fee equal to the dressing fee paid on the day will be charged.
3.The late fees mentioned in each of the preceding paragraphs will be settled in cash at the relevant store.
Article 6 Items that cannot be kept
1.The only luggage that our company will store and manage is clothing, and in particular, we cannot store the following items as we cannot take responsibility for their storage.
1) Valuables (house/car keys, luxury clothing/bags, jewelry, watches, cash, passports, etc.)
2) Electronic devices (PCs, cameras, game consoles, tablets, etc.)
3) Explosive, ignitable, or other dangerous objects
4) Living things, frozen products, refrigerated products, fruits and vegetables, fresh flowers, and other items that leak water or are easily deteriorated
5) Items that violate public order and morals (including items whose use is prohibited by law, such as illegal drugs)
6)Easy to break or deform
7) Objects that cannot be laid down
8)Other items that our company deems difficult to store
2.Notwithstanding the preceding paragraph, if the User wishes to entrust the items listed in the items of the preceding paragraph to the Company, the User shall be responsible for the Company's liability for loss (including theft), damage, water leakage, etc. of the items. You acknowledge in advance that we do not assume any responsibility.
Article 7 Handling of lost items
In the event that a user leaves behind an item in our store, the Company will handle the item as follows, and the user acknowledges this in advance.
1.If you have left behind a passport, driver's license, credit card, cash, or precious metals such as accessories, please bring them to the nearest police station of the store. If the user contacts us before we deliver the item to the police station, we will return the item by visiting the store, but we will not return the item by mail.
2. For items left behind other than those mentioned above, unless the user contacts us within one week after we discover the item, ownership will be deemed abandoned and will be disposed of.
If the user contacts us within the above period, the item will be returned by post, cash on delivery. Please note that the shipping date will be determined by our company.
Article 8 Prohibited matters for users
1. When using this service, our company prohibits users from engaging in the following acts.
1) Acts that violate laws and regulations
2) Acts that may harm public order or good morals
3) Acts of using this service in a manner other than the method specified by the Company
4)Other acts that violate these Terms
2. If a user engages in any of the prohibited acts set forth in the preceding paragraph, the Company may suspend part or all of the provision of this service at any time without prior notice to the user.
3. The Company may request users who engage in the prohibited acts set forth in Paragraph 1 to stop the prohibited acts, and will also claim compensation for damages if the prohibited acts cause damage to the Company. can do.
Article 9 Suspension/Abolition of Service
1. In the event that any of the following applies, the Company may temporarily suspend the provision of all or part of the Service without notifying the customer.
1) In the event that inspection, maintenance, construction, etc. of systems, equipment, etc. necessary for providing this service is required
2) If it becomes difficult to provide this service due to fire, accident, power outage, natural disaster, war, terrorism, riot, disturbance, labor dispute, or other emergency situation
3) If it becomes difficult to provide this service due to laws, regulations, administrative disposition, etc.
4) In other cases where the Company determines that it is necessary to temporarily suspend the provision of this service
2. If the Company determines that it is difficult to continue providing the Service, if the Company determines that it is necessary to discontinue the Service for operational reasons, or if any other unavoidable reason occurs, the Company may terminate the Service. The provision may be discontinued.
3. If the Company suspends or abolishes the provision of this Service, the Company shall refund to the User the amount of the usage fee paid by the User that corresponds to the service that could not be provided due to the suspension or abolition of the Service. We will refund your payment.
Article 10 Cancellation of contract
1. If the user wishes to cancel a reservation, the user must contact the store by phone (or by email if the phone cannot be reached) by 5:00 p.m. the day before the reservation date. Please note that if you do not receive the above notification, you will be subject to a cancellation fee even if you cancel on the same day.
2.If you are late for your reservation time, your reservation may be canceled on the same day.
3. If you feel unwell during the dressing process or discover that you are pregnant during the dressing process, your reservation will be canceled on the same day.
4.Please note that we cannot provide refunds for cancellations on the day of the event.
5. If the user falls under one of the following items, the Company may cancel this agreement without requiring notice to the user. In this case, the Company may charge the User a penalty equivalent to the cancellation fee set forth in the preceding paragraph.
1) If the user violates any of the prohibited matters stipulated in these Terms, etc.
2) If the user's actions regarding this service may violate laws or public order and morals
3) If the user or his companion is found to be an anti-social force as defined in Article 12
4) If the user does not pay the usage fee for this service by the specified date
Article 11 Disclaimer
1.The Company shall not be liable for any damage caused to the User in connection with the provision of this Service, unless the damage is caused intentionally or by negligence on the Company's part.
2. In particular, our company will not be held responsible in the following cases, as our company is usually not found to be at fault.
1) The paint material used in the luggage compartment may adhere to the contents of the luggage and cause color transfer. (It is the user's responsibility to protect items that are likely to stain with a plastic bag, etc.)
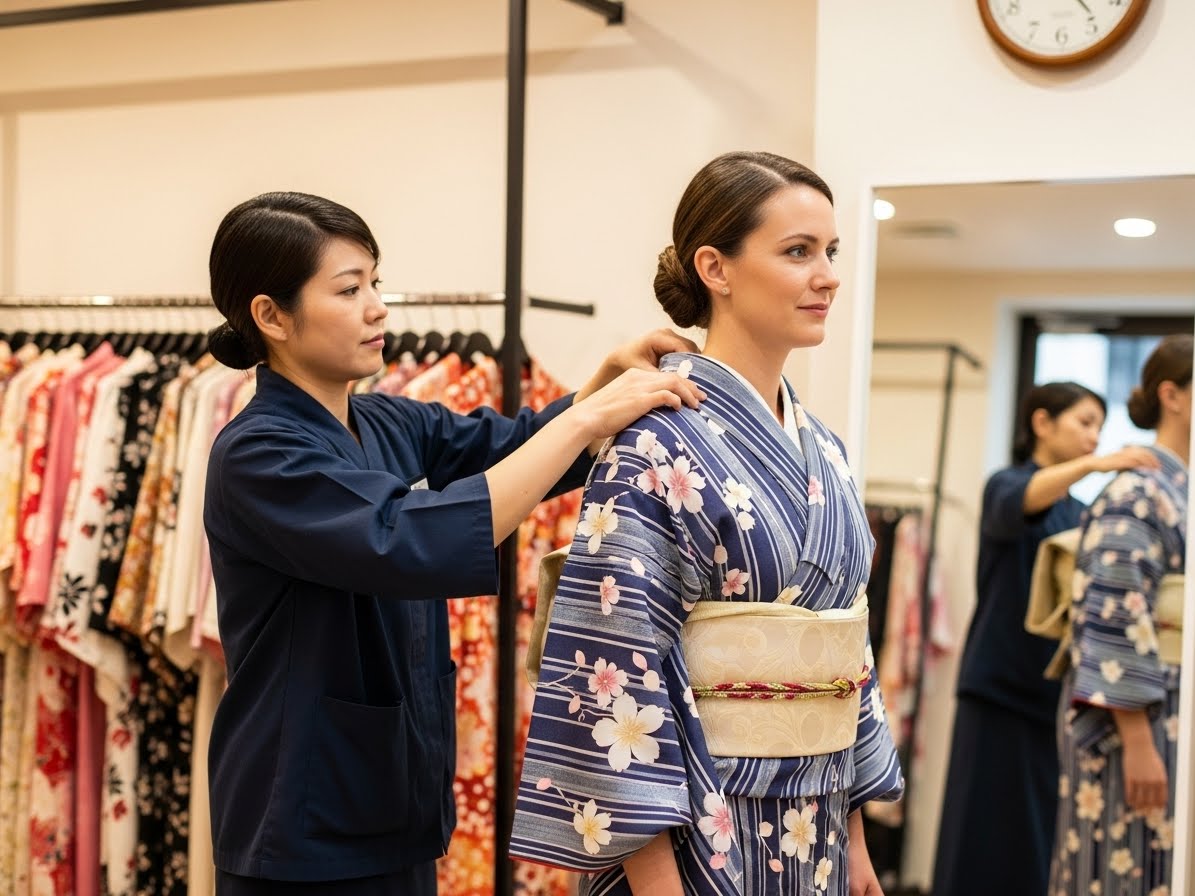
2) When our employees help people put on and take off their clothes, electronic devices, etc. inside their clothes may fall and be damaged. (It is the user's responsibility to store electronic devices while wearing or undressing.)
3) The provision of this service may be delayed due to congestion or other reasons, or delays in sightseeing, dining, performances, etc. (We cannot guarantee the completion time, so please make your reservation with plenty of time.)
4) Suffering from rough skin, rashes (hives, etc.), infectious diseases, etc. (The clothing we rent is rented to an unspecified number of users, and we manage it in a reasonable and appropriate manner. However, as the causal relationship between this service and skin irritation, rashes (hives, etc.), infectious diseases, etc. is unknown, the Company cannot be held responsible.
5) Falls outside the store (We do not take any responsibility for falls outside the store, as falls are caused by factors other than our company, such as road conditions and the user's walking style.)
6) If a user fails to follow store notices or the instructions and guidance of employees and falls, gets burned, or suffers other injuries in the store (in this case, it is due to the user's negligence, and the Company cannot be held responsible. Especially Please be careful to stay still and follow the staff's instructions during hair styling, as the treatment uses high-heat equipment, so there is a risk of burns from the hair iron.
7) If your baggage is lost or changed due to a natural disaster or other force majeure
8) If the user suffers damage due to any other reason not attributable to our company (for example, burns caused by heating pads, deterioration of hair extensions caused by hair styling, fading of coloring caused by curling irons, etc.), we will not be responsible for the above reasons. )
3.For damages caused to users due to our negligence, we shall be responsible only for direct and ordinary damages (not including lost profits), and the amount of compensation shall be limited to 10,000 yen.
Article 12 Elimination of anti-social forces
1.Users may not provide the Company with any information regarding current organized crime groups, organized crime members, persons who have ceased to be members of organized crime for less than five years, quasi-members of organized crime groups, companies associated with organized crime, corporate racketeers, social movements, etc. I declare that I do not fall under the category of intelligent violent groups, etc. or any other persons equivalent to these (hereinafter collectively referred to as "organized crime group members, etc."), and that I do not fall under any of the following items, and will not fall under any of the following items in the future. We promise not to do so.
1) Having a relationship where organized crime group members, etc. are recognized to be controlling the management
2) Having a relationship with organized crime group members, etc. that is deemed to be substantially involved in management
3) Having a relationship that is recognized as unfairly exploiting organized crime group members, etc.
4)Having a relationship that is recognized as being involved in providing funds, etc. or providing benefits to organized crime group members, etc.
5) An officer or person substantially involved in management has a socially reprehensible relationship with an organized crime group member, etc.
2. Users promise to the Company that they will not engage in any of the following acts, either by themselves or by using a third party.
1) Violent demands
2) Unreasonable demands that exceed legal responsibility
3) Acts of threatening behavior or using violence regarding transactions
4) Spreading rumors, using fraudulent means or force to damage the credibility of our company, or disrupting our business
5)Other acts similar to the preceding items
3. If the user falls under any of the items of Paragraph 1, such as an organized crime group member, or any of the items of Paragraph 1, or performs any act that falls under any of the items of the preceding paragraph, the Company shall not give any notice or demand. We may stop providing services to the user or cancel the contract with the user based on these Terms without prior notice.
4. Termination pursuant to the preceding paragraph does not prevent the Company from claiming compensation for damages against the User.
Article 13 Handling of personal information
We will appropriately handle personal information obtained in connection with this service in accordance with our privacy policy.
Article 14 Terms of Use/Changes to services, etc.
1. Our company may change these Terms without prior notice if it becomes necessary to do so due to amendments to laws, changes in social conditions, or other circumstances.
2. If the Company changes these Terms, it will set an effective date, and by the effective date, the Company will notify the following matters by posting on the Company's website or by other means.
1)Change these Terms
2) Contents of these Terms after changes
3) Effective date
Article 15 Prohibition of transfer
Users may not transfer their status under this Agreement, assign their rights and obligations under this Agreement to a third party, or provide them as security for a third party without the Company's written consent. will do.
Article 16 Governing law and jurisdiction
The governing law of these Terms is Japanese law, and the Kyoto District Court shall have exclusive jurisdiction over any disputes arising from these Terms.
Supplementary Provisions (January 24, 2022)
These Terms of Use apply from January 24, 2022.

 BOOK NOW
 BUSINESS HOURS